TOOLMAN TIPS – Measure Like It Matters

TOOLMAN TIPS – Measure Like It Matters

Measuring is one of those steps everyone assumes they’ve already mastered.

After all, how hard can it be to pull out a tape measure and read a couple numbers?

That confidence—especially among beginners—is exactly why measuring is the step most often rushed, underestimated, or skipped entirely. And that’s when the trouble begins.

In our workshop, we see it all the time: a student eyeballs a board, convinced they can “just tell” where to cut. Another guesses the center of a hinge because it “looks about right.” Someone else marks a line with the tape held at a heroic angle, certain it won’t matter. A few minutes later, reality arrives: one piece too short, two holes that don’t line up, a drawer that sticks, or a shelf that leans ever so slightly toward sadness.

The truth is, measuring isn’t complicated—but it is critical.

It’s the quiet, unglamorous part of toolmanship that saves you from headaches, wasted materials, and a project that now requires “creative problem-solving” you never intended.

The old saying holds up: “Measure twice, cut once.” But around here, we like to add:

“Measure twice so you only have to explain it once.”

A good measurement is slow, steady, and intentional:

  • Keep the tape straight, not bowed like a fishing pole fighting a salmon.
  • Mark clearly—no vague dots that could be a measurement or a speck of dust.
  • Start from the correct end of the tape (yes, it happens).
  • Double-check with your eyes and your brain before committing with the saw.

Taking an extra 20 seconds in the measuring stage almost always saves 20 minutes down the line. And sometimes, it saves the whole project.

So the next time you feel tempted to skip the “easy part” and jump straight into cutting, drilling, or building—pause.

Grab the tape.

Take the moment.

Measure like it matters…

Because it does!

In every good toolbox, measurement is where mastery begins.

TOOLMAN TIPS – Cabinet Doors

TOOLMAN TIPS – Cabinet Doors

Cabinet Door Conundrum: Fixing that frustrating hinge alignment

Ever faced a problem at home that seemed minor but frustrating?

Toolman Tips is here to share simple, practical solutions like this—   fixes anyone with basic toolmanship skills can handle.

At Bendix Academy, we teach students to approach problems with confidence and mechanical know-how. Scroll below for this quarter’s Toolman Tip!

You walk into your kitchen and there it is again: that one cabinet door that’s crooked, sagging, or bumping into its neighbor. It still opens and closes, but something feels… off. Most people live with it. But anyone with basic mechanical self-reliance knows: this is a problem you can fix.

Cabinet door alignment issues are one of the most common annoyances in the home—and one of the easiest to fix if you know what to look for.

Older-style cabinet hinges, sometimes called “surface-mounted” or “butt hinges,” are often visible from the outside and offer little to no adjustment once installed. But most modern cabinets use European-style concealed hinges, which are mounted inside the cabinet and designed to be easily adjustable. These clever mechanisms allow fine-tuning in three directions: up/down, left/right, and in/out (depth). That’s right—no need to remove and reinstall the entire hinge. Just a screwdriver and some patience can restore a perfect fit.

This is exactly the kind of fix our Toolmanship Mentoring students learn to approach with calm logic and skill. We don’t just teach how to use tools—we teach how to observe, assess, and adjust. When a student learns to correct a misaligned cabinet door, they’re gaining more than a functional cabinet—they’re gaining confidence and control over their environment.

And it’s that mindset that defines mechanical self-reliance.

Step-by-Step: How to Adjust a Cabinet Door

Before you begin:

Open the cabinet door and locate the concealed hinges inside. Most modern adjustable hinges have two screws per hinge—one for movement, one for mounting. Some may have a third screw for depth.

Start by collecting the tools you'll need
  • Phillips screwdriver
  • Small flashlight (optional)
  • Patience and a good eye for alignment
1. Diagnose the Problem

Is the door too high or low? Too far left or right? Tilted? Sticking out too far or recessed too deep?

2. Adjust Left/Right (Side-to-Side)


Locate the side adjustment screw (usually the screw closer to the cabinet face). Turn clockwise to move the door closer to the hinge side, counterclockwise to move it away.

3. Adjust Up/Down (Height)

Loosen the mounting screws (usually on the vertical plate attached to the cabinet wall). Gently shift the door up or down as needed, then tighten to secure.

4. Adjust In/Out (Depth)

Some hinges have a depth adjustment screw located deeper inside the hinge arm. Turning this adjusts how far the door sits from the cabinet face.

5. Fine-Tune Both Hinges; Close and Check

Always make small adjustments—just a quarter turn at a time. Alternate between the top and bottom hinges to maintain even spacing and flush alignment.

After each adjustment, close the door and check its alignment. Repeat until everything lines up neatly.

A misaligned cabinet door might seem like a small issue—but when you’ve got toolmanship, it’s just another opportunity to solve a problem with skill and care.

At Bendix Academy, we’re raising up a generation of students who don’t walk past broken things—they fix them. And with each small repair, they grow into more capable, confident citizens. That’s the power of mechanical self-reliance—starting with a hinge and extending into a lifetime of useful service.

So the next time you see a crooked cabinet door, don’t tolerate it. Fix it! It’s a simple adjustment that anyone can make—and it’s a reminder of how a little toolmanship can go a long way.

See Bendix Academy in Action

A picture speaks a thousand words, but a visit is priceless.  Bendix Academy invites everyone with interest to email toolmen@bendixacademy.org or call us at 810-599-4035 to schedule a tour (no walk-ins please) and see why we’re growing.

You’ll experience the impact firsthand!

Support the Next Generation

Want to make a difference?  Just $5/month can help a student discover a lifetime of skills. Just click on the red button to support with your donation of any amount. Every contribution counts!


Toolman Times quarterly newsletter PDF archives

Bendix Academy QR Quarterly Newsletter - Toolman Times

See recent Quarterly Newsletter articles in depth

Bendix Academy QR Quarterly Newsletter Posts and Stories


Join us in shaping Tomorrow’s Toolmen Today!

WE ARE BUILDING a place for generations to explore, teach, and learn the mechanical world together, creating Tomorrow’s Toolmen Today.
TOOLMAN TIPS – Appliance Door Reversal

TOOLMAN TIPS – Appliance Door Reversal

Tight fit?  What to do if the door of your appliance is on the wrong side

It can happen to anyone…

You’re happy to get that new appliance, and then once it’s placed in it’s space, you notice just one little problem.  The door opens the wrong way!  What to do now?

Many household appliances are designed with reversible doors, allowing the hinge to be installed on either side. This feature, found on refrigerators, dryers, and some front-load washing machines, offers flexibility that can make a big difference in a home’s functionality.

Despite how useful this option is, many people never take advantage of it—either because they don’t realize their appliance has this capability or they assume it requires professional service. In reality, reversing a door is a simple task for anyone with basic toolmanship skills and mechanical intuition.

Graduates of our Toolmanship Mentoring program at Bendix Academy develop exactly the kind of confidence and self-reliance needed for such tasks. With a few common tools and a logical approach, they can adapt appliances to fit their needs instead of working around design limitations.

Understanding the built-in flexibility of modern machines is a hallmark of mechanical self-reliance. When a door opens the wrong way, a toolman sees not an inconvenience but an opportunity—a small but useful modification that puts their skills to work.

So, the next time you or someone you know struggles with a poorly placed appliance door, remember: For those who’ve embraced toolmanship, it’s just another simple fix!

Reversing the way a refrigerator door opens is usually straightforward and requires only a few basic tools. Here’s a step-by-step guide for the toolman near you.

Remember, most refrigerators are designed with reversible doors, but it’s always a good idea to check the user manual for any model-specific steps

Ready to begin?  Collect your tools, check the manual, and put your toolmanship skills to use by clicking on the instructions below!

First, collect the tools you'll need
  • Phillips screwdriver
  • Adjustable wrench or socket wrench
  • Flathead screwdriver (for prying)
  • Putty knife (if needed for trim pieces)
  • Tape (to hold the door in place while working)
Then check the user manual for any model-specific steps

Most appliance brands provide online access to user manuals. Go to the official website of your refrigerator’s manufacturer and search for your model number. Some common ones include:

If the manufacturer’s site doesn’t have it, try these databases:

If you purchased your refrigerator from a major retailer, they may have manuals available:

1. Unplug the Refrigerator

Before starting, unplug the refrigerator for safety.

2. Empty the Door Shelves

Remove any food or items from the door to make it lighter and easier to handle.

3. Remove the Top Hinge
  • Locate the top hinge on the side of the door.
  • Remove the screws using a screwdriver or socket wrench.
  • Lift the hinge off and set it aside.
  • Carefully lift the door off the lower hinge and place it on a padded surface.
4. Remove the Bottom Hinge
  • Unscrew and remove the bottom hinge from the refrigerator body.
  • If there’s a middle hinge (on some models), remove it as well.
6. Move the Handles (If Necessary)
  • Some refrigerator doors have separate handles that must be moved.
  • Unscrew the handles and reattach them on the opposite side.
  • Cover any exposed holes with provided caps (some models include these).
7. Reinstall the Door
  • Place the door onto the bottom hinge.
  • Align the top hinge and screw it back in place.
5. Transfer Hinges to the Opposite Side
  • Locate the pre-drilled holes on the opposite side of the fridge.
  • Reinstall the bottom hinge in the corresponding holes.
  • If applicable, attach the middle hinge.
8. Check Alignment and Tighten Everything
  • Ensure the door closes properly and sits evenly.
  • Tighten all screws securely.
  • If needed, adjust the leveling feet to ensure a proper seal.
9. Plug in the Refrigerator and Test
  • Plug the fridge back in and check that the door seals properly.
  • Make sure the gasket (rubber seal) is intact and no gaps exist.

See Bendix Academy in Action

A picture speaks a thousand words, but a visit is priceless.  Bendix Academy invites everyone with interest to email toolmen@bendixacademy.org or call us at 810-599-4035 to schedule a tour (no walk-ins please) and see why we’re growing.

You’ll experience the impact firsthand!

Support the Next Generation

Want to make a difference?  Just $5/month can help a student discover a lifetime of skills. Just click on the red button to support with your donation of any amount. Every contribution counts!


Toolman Times quarterly newsletter PDF archives

Bendix Academy QR Quarterly Newsletter - Toolman Times

See recent Quarterly Newsletter articles in depth

Bendix Academy QR Quarterly Newsletter Posts and Stories


Join us in shaping Tomorrow’s Toolmen Today!

WE ARE BUILDING a place for generations to explore, teach, and learn the mechanical world together, creating Tomorrow’s Toolmen Today.
TOOLMAN TIPS – The Most Important Tools

TOOLMAN TIPS – The Most Important Tools

Patience & Perseverance

In most of our newsletters, we like to share something practical, something you can hold in your hand, adjust, tighten, or fix. But this month, we want to step back and talk about tools that don’t hang on the wall or sit in a toolbox. These are the tools that live in your mind and shape every outcome long before a wrench ever touches a bolt. If toolmanship is the art of working with tools, then we must also recognize that the toolman himself is the most important tool in the shop.

Patience: Try again…

The first of these is patience. We would argue that patience is not just important, it is the most important tool a toolman possesses. It is also one of the hardest for young people to learn, especially in a world that rewards speed and instant results. But in the shop, impatience has consequences.

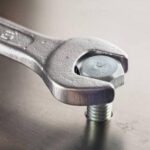
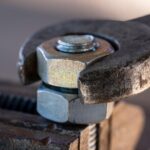
Many of us have felt that moment when a stubborn bolt refuses to turn. You lean in a little harder. Maybe you grab a bigger wrench. Maybe you give it a few taps with a hammer. And somewhere in the back of your mind, there’s a quiet warning: this is about to break. That moment is where toolmanship is either proven or lost.

An experienced toolman knows when to stop. Not quit — stop. There is a difference. Instead of forcing the issue, he steps back and changes the approach. He might apply heat with a torch to expand the metal. He might introduce penetrating oil and let it work its way in over hours, not minutes. He might simply take more time to study how the parts are assembled before making the next move. In some cases, he’ll walk away entirely and come back later with a clearer head. That is patience in action. It is not passive; it is deliberate, thoughtful, and disciplined.

Patience also shows itself in the willingness to seek understanding before action. Rather than guessing and risking damage, a good toolman will pause to research, ask a mentor, or study a diagram. Today, that might mean looking something up online, using AI, or calling someone with more experience. There is no shame in that. In fact, it is a mark of maturity.

Perseverance: …and keep trying.

​Closely tied to patience is perseverance, which we would call the second most important tool a toolman carries. While patience teaches us when to pause and rethink, perseverance teaches us not to give up.

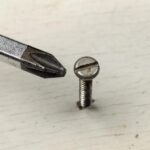
Every project eventually presents a problem that doesn’t yield easily. A stripped fastener, a misaligned component, a tool that won’t quite fit the way you need it to, these are moments where frustration can creep in. But good toolmen do not walk away defeated. They adapt.

Perseverance means trying a different method. It means reaching for a different tool, adjusting your angle, changing your posture, or even rethinking the entire approach. There’s a saying often attributed to Albert Einstein: insanity is doing the same thing over and over again while expecting different results.

“Insanity is doing the same thing over and over again and expecting different results.” 

In the shop, that lesson becomes very real. If something isn’t working, repeating the same action is rarely the answer. Instead, perseverance calls for creativity and problem-solving. It asks you to think, to observe, and to try again, a great road to success.

Always remember, the goal is not to prove how much you already know, but to ensure the job is done correctly. Over time, these small decisions build into a reputation—one of care, precision, and reliability.


A Powerful Perspective

Perspective

There is one more perspective that we believe is essential, and it may sound simple, but it is powerful: the object you are working on is not working against you. That stubborn bolt does not have an attitude, ulterior motive, sense or humor, trying to impress you, competitive, manipulative. It is just an just an object, subject to the laws of physics and time. When we forget this, mistakes happen.

“Because people can frustrate or irritate me, I am often heard saying, ‘I’d rather work three hours on stubborn bolt than to work with that person for 3 minutes.’ 

“I find serenity in working alone on mechanical projects, because there is no one to get frustrated by except myself, in which case that can often be resolved with patience and perseverance.”

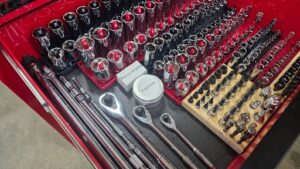
Patience and perseverance are invisible tools. They do not hang on the wall, sit in a drawer, or come in a socket set. They reside in the toolman’s mind, ready to be applied when the moment calls for them. Knowing when to reach for these tools is one of the clearest marks of maturity and experience. Many people can swing a hammer or turn a wrench, but not everyone knows when to slow down, think carefully, and persist through difficulty.

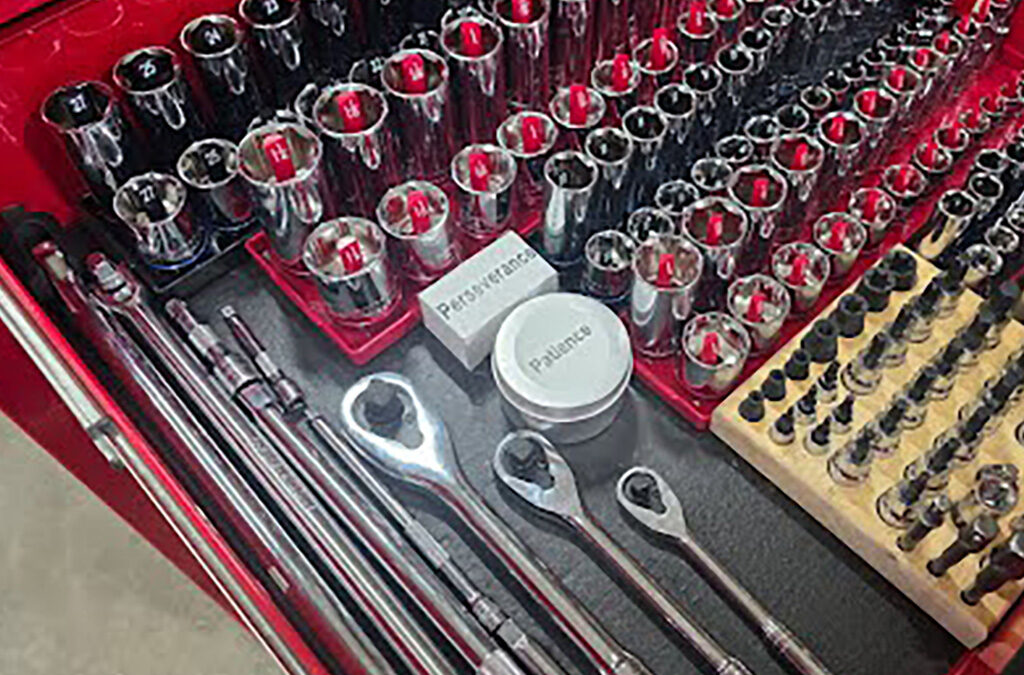
At Bendix Academy, beside the wrenches, hammers, and sockets, our students will find two small containers labeled Patience and Perseverance. Though empty to the eye, they are full of meaning. They remind our students that some of the most important tools in the shop cannot be touched by hand. There are moments when adding more force is the wrong answer, when frustration clouds judgment, or when the next best step is to pause, rethink, and try again with a clearer mind.

Wisdom is knowing when to apply a generous amount of patience to the task before you, and when to add perseverance so you do not give up too soon. Very often, the solution to a difficult problem is not found in a larger hammer or longer wrench, but in the disciplined use of these unseen tools.

Passing Mechanical Self-Reliance On to the Next Generation

The Way It Was - A Reflection by Our Founder Todd Trainor

Our Mission - One Sentence, A Lifetime of Meaning

History of Bendix Academy and Toolmanship Mentoring

Most Important Tools - Patience & Perseverance

Student Scholarship Fund - Spreading Toolmanship

See Bendix Academy in Action! 

Visit us, or have us present to your group.

A picture speaks a thousand words, but a visit is priceless.

Come visit our workshop!  Bendix Academy invites everyone with interest to email toolmen@bendixacademy.org or call us at 810-599-4035 to schedule a tour (no walk-ins please) and see why we're growing.


Can't visit us? We can visit you!